The Asphalt Shingle Roof Installation Process Explained Step by Step
People searching for asphalt shingle roof installation often want to understand the process and find local contractors who can expertly handle each step.
Understanding the asphalt shingle roof installation process explained step by step can provide property owners with valuable insights into what to expect when upgrading or replacing their roof. Whether planning a new installation or a roof replacement, knowing the general stages involved helps homeowners make informed decisions and ensures they are prepared for each phase of the project. Property owners in the area may explore this topic to better understand the work involved, assess the quality of service providers, and ensure their investment is handled efficiently and effectively by local contractors experienced in asphalt shingle roofing.
For those considering a roof upgrade, connecting with local service providers who specialize in asphalt shingle roof installation can offer practical benefits. These professionals understand the specific steps involved and can deliver expert craftsmanship tailored to the local climate and building requirements. Keep reading to learn more about how the asphalt shingle roof installation process unfolds and how trusted local contractors can assist in achieving a durable, reliable roof that enhances the property's value and curb appeal.
- New roof installation - homeowners planning to replace an aging or damaged roof can rely on local contractors to handle the asphalt shingle roof installation process explained step by step.
- Roof repair projects - when existing shingles are worn or missing, service providers can perform partial or full replacements, guiding clients through the installation process.
- Roof upgrade services - property owners seeking to improve curb appeal or increase durability often work with local pros who can expertly install asphalt shingles following a clear process.
- Storm damage restoration - after severe weather, local contractors can assess and replace damaged roofing components, explaining the asphalt shingle installation process along the way.
- New construction roofing - builders and developers incorporate asphalt shingle roofs into new structures, with service providers managing the installation process step by step.

When homeowners search for the asphalt shingle roof installation process explained step by step, they are typically looking to understand what’s involved in replacing or installing a new roof using asphalt shingles. This topic often relates to projects where a roof has sustained damage, reached the end of its lifespan, or a property owner is upgrading for improved durability and curb appeal. Such searches reflect a desire for transparency and clarity about what to expect during the installation, as well as an understanding of how different phases fit together. Property owners may also be exploring options for a roof replacement, planning a new construction, or considering a roof upgrade to enhance the value and appearance of their homes.
This process is connected to various property-related plans and potential problems. For example, a homeowner might be dealing with leaks, excessive energy costs, or visible wear and tear, prompting a need for a reliable roof replacement. Understanding the step-by-step process helps clarify what is involved in addressing these issues efficiently. It also relates to planning for long-term protection of the property, ensuring the roof’s integrity, and avoiding future costly repairs. Local contractors who specialize in asphalt shingle installations are key partners in this process, bringing expertise to each phase-from removing old roofing materials to final inspection-helping homeowners navigate the project with confidence.
The types of properties that typically come up in discussions about asphalt shingle roof installation include single-family homes, townhouses, and small commercial buildings. These properties often feature pitched roofs, which are ideal for asphalt shingles due to their durability and ease of installation. Homeowners may also be considering a new roof for historic or older homes where a traditional asphalt shingle system provides a cost-effective and aesthetically pleasing solution. Regardless of the property type, local service providers understand the specific requirements and challenges involved, such as roof pitch, ventilation needs, and local building codes, ensuring that each installation is tailored to the property’s unique characteristics.
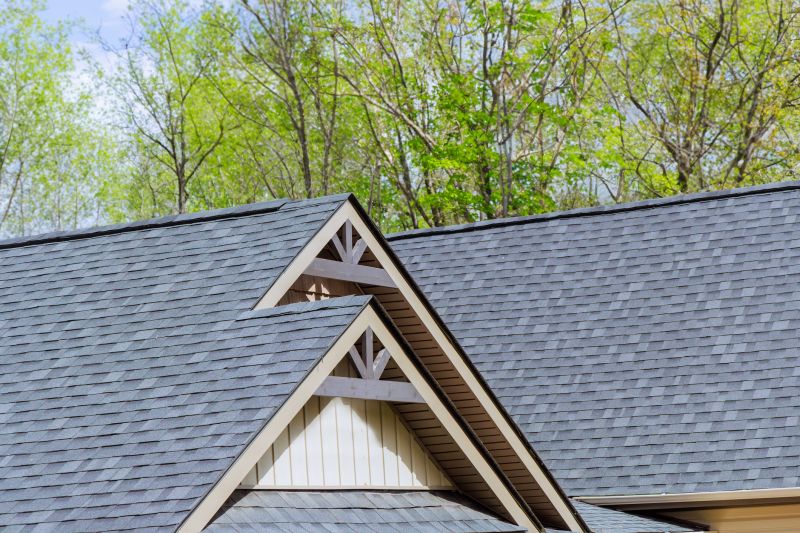
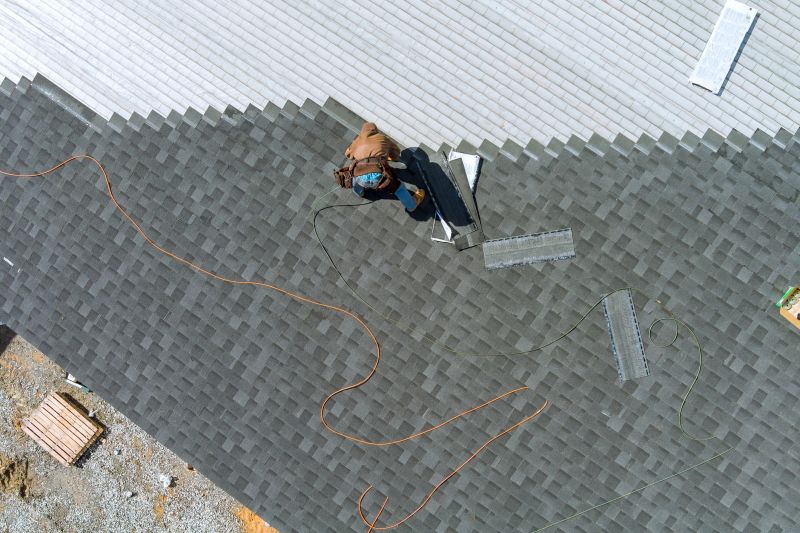
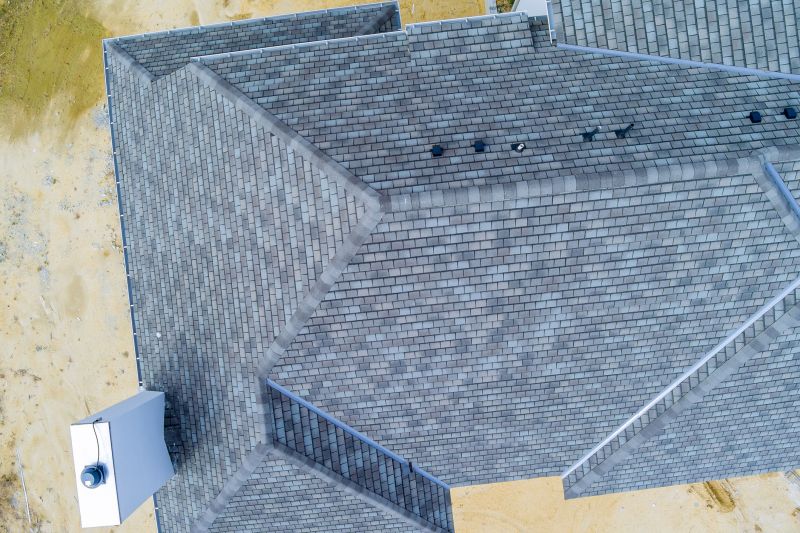
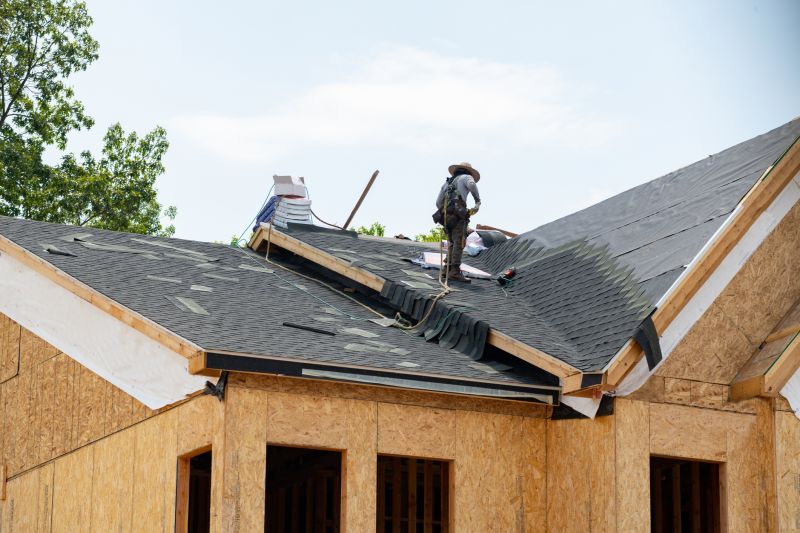
Understanding the asphalt shingle roof installation process explained step by step helps homeowners see how local pros fit into the project. Most installations begin with removing the existing roofing material and inspecting the underlying structure for damage. This is followed by preparing the roof deck, installing underlayment, and then carefully laying down the asphalt shingles in a specific pattern to ensure proper water runoff and longevity. The final steps include installing flashing, sealing edges, and conducting a thorough inspection to confirm everything is properly aligned and secured. Knowing these stages allows property owners to better communicate with their chosen service providers and make informed decisions about their roofing project.
Roof Replacement Projects - replacing an entire roof involves similar planning, material selection, and installation skills as the asphalt shingle roof installation process explained step by step.
Attic Insulation Installation - installing attic insulation requires understanding of roofing structures and proper planning to ensure effective insulation alongside roofing projects.
Roof Ventilation System Installation - proper ventilation installation involves precise planning and skillful work that aligns with the steps involved in asphalt shingle roof installation.
Gutter System Installation - installing gutters requires careful planning and execution, often coordinated with roofing projects to ensure proper drainage and roof longevity.
Roof Repair Services - repairing damaged roofing components involves similar assessment, material handling, and installation techniques as a full asphalt shingle roof installation.
Skylight Installation Projects - adding skylights involves precise cutting, sealing, and integration with the roofing system, similar to the detailed process of asphalt shingle installation.
When evaluating local contractors for asphalt shingle roof installation services, it is important to consider their experience with similar projects. Homeowners should inquire about the types of roofs they have installed in the past and whether they have handled projects comparable in size and complexity. A contractor with a solid track record of successfully completing asphalt shingle roof installations can provide a better understanding of what to expect throughout the process. Reputable references or reviews from previous clients can offer valuable insights into the contractor’s reliability, craftsmanship, and ability to adhere to project timelines and expectations.
Clarity in written expectations is a crucial factor when comparing local service providers. Homeowners should seek detailed proposals or estimates that clearly outline the scope of work, materials to be used, and the steps involved in the asphalt shingle roof installation process explained step by step. This helps ensure there are no surprises or misunderstandings about what the project entails. A professional contractor will communicate openly about the different phases of the installation, including preparation, shingle application, and cleanup, allowing homeowners to make informed decisions and set realistic expectations for the project.
Effective communication and transparency are essential qualities when choosing a local contractor. Homeowners should assess how well the service providers listen to their questions and provide clear, straightforward answers. Good communication also involves timely updates and responsiveness to concerns throughout the project. Contractors who prioritize open dialogue and provide comprehensive information help foster a smoother installation experience. By focusing on these aspects-experience with similar projects, clear written expectations, and strong communication-homeowners can better compare local pros and find the right partner to handle their asphalt shingle roof installation needs.
Property owners often search for the asphalt shingle roof installation process explained step by step when they are planning practical projects around their homes and businesses. Local pros provide Asphalt Shingle Roof Installation services for everyday jobs and straightforward project options.
The process of installing an asphalt shingle roof is a common project for property owners looking to improve the durability and appearance of their homes. Many people search for information on this topic to better understand what the installation involves and to ensure they choose reputable local contractors for the job. Typically, local service providers follow a series of straightforward steps, starting with preparing the existing roof surface, removing old materials if necessary, and inspecting the underlying structure. This helps ensure that the new asphalt shingles will be properly supported and that the installation will last for years to come.
Throughout the installation process, local contractors focus on precise placement of the shingles, ensuring proper alignment and secure fastening. They also take care to install necessary underlayment and flashing to prevent leaks and protect the roof from weather elements. Property owners often look up this process to confirm that local pros are experienced and knowledgeable about each step, which can help avoid common issues like improper sealing or shingle damage. By understanding the typical steps involved, homeowners can make informed decisions when choosing local roofing service providers to handle their asphalt shingle roof installation.
What are the main steps involved in the asphalt shingle roof installation process explained step by step? The process typically includes removing the old roofing, preparing the roof deck, installing underlayment, laying down the asphalt shingles, and finishing with flashing and sealing. Local contractors can guide homeowners through each stage to ensure proper installation.
How do local service providers ensure the quality of the asphalt shingle roof installation process explained step by step? They follow industry best practices, use quality materials, and adhere to proper installation techniques to help ensure the durability and performance of the roof.
What preparations are needed before starting the asphalt shingle roof installation process explained step by step? Homeowners should clear the area around the house, ensure access to the roof, and discuss any existing roof issues with local contractors to facilitate a smooth installation.
How long does each phase of the asphalt shingle roof installation process explained step by step typically take? While durations vary based on the roof size and complexity, local pros can provide estimates for each phase, from removal to final inspection, to help plan accordingly.
What should homeowners expect during the asphalt shingle roof installation process explained step by step? Homeowners can expect noise, some debris, and temporary access restrictions, but local service providers work to complete each step efficiently and with minimal disruption.
Understanding the roof inspection process - property owners can learn how local contractors evaluate existing roof conditions to determine if a full replacement or repairs are needed before starting the asphalt shingle roof installation.
Preparing the roof deck - homeowners can ensure the roof surface is clear and ready for installation, facilitating a smoother process when local service providers begin laying down new asphalt shingles.
Choosing the right materials - property owners can explore different asphalt shingle options with local pros to select the best style and durability for their home’s climate and aesthetic preferences.
Managing the installation timeline - understanding the typical steps involved helps property owners coordinate other home improvement projects and plan for minimal disruption during the asphalt shingle roof installation.
If you are thinking about the asphalt shingle roof installation process explained step by step for a property, this guide is meant to help you understand this topic, the typical project types, and how different options might fit your plans.
When you are ready, you can use the quote form on this page to share a few details about your project. From there, local pros can review the basics and follow up with options that match what you have in mind.